
1
2
3
4
5
6
7
8
9

Things to Remember
Be patient, not perfect.
When you decide to start drawing, be patient and don’t worry about how quickly you will improve. Like with any art or skill, practice really does make perfect, so keep in mind that professional designers spend years crafting their drawing skills. Many people also make the mistake of thinking that drawing is a talent you either have or you don’t, but drawing instructors will tell you that everyone can be trained to sketch. Remember that a fashion sketch doesn’t have to be completely lifelike and perfectly proportioned. While detail is important in communicating your ideas, focus more on capturing the tone or feeling of your design.
Start with a method that feels comfortable.
There are two ways to draw designs: flat and dimensional. A dimensional sketch will show the depth and different angles of a design, and an easy way to get a sense of dimensional drawing is to trace a person in a magazine. This will give you a good sense of proportion and build your confidence in sketching before you try drawing freehand. A flat sketch, on the other hand, shows the full front or full back of a design. These designs are usually drawn using a croquis, or template of a proportioned, two-dimensional body. After you spend some time tracing fashions, you may want to look online for a croquis to guide your freehand designs.
Pay attention to detail.
Before you start developing your own designs, make sure you’ve done your research on current fashions. Being attuned to the latest trends in the fashion industry means survival and success, and this knowledge will serve as a foundation for your designs and help you predict upcoming looks. Practice sketching different styles and make sure you understand the clothing itself–how it’s constructed, how it fits, how it’s cut, and so on. Also try sketching different types of material to get a feel for texture. Every detail from the buttons to the pockets will contribute to the quality of your design as a whole.
Be creative.
Sketching is your chance to use your imagination and show your skill at designing. Make the best of your knowledge when developing your ideas, but don’t let your attention to detail overwhelm you before you begin. Instead, start with simple designs after you’ve practiced drawing existing looks. Your goal should be to practice sketching the feeling of a certain look, and this is the best way to start getting the designs in your head onto paper.
Finally, have fun and be confident! Illustrating fashion is a great hobby/job and can help you later if you decide to make it part of your career.
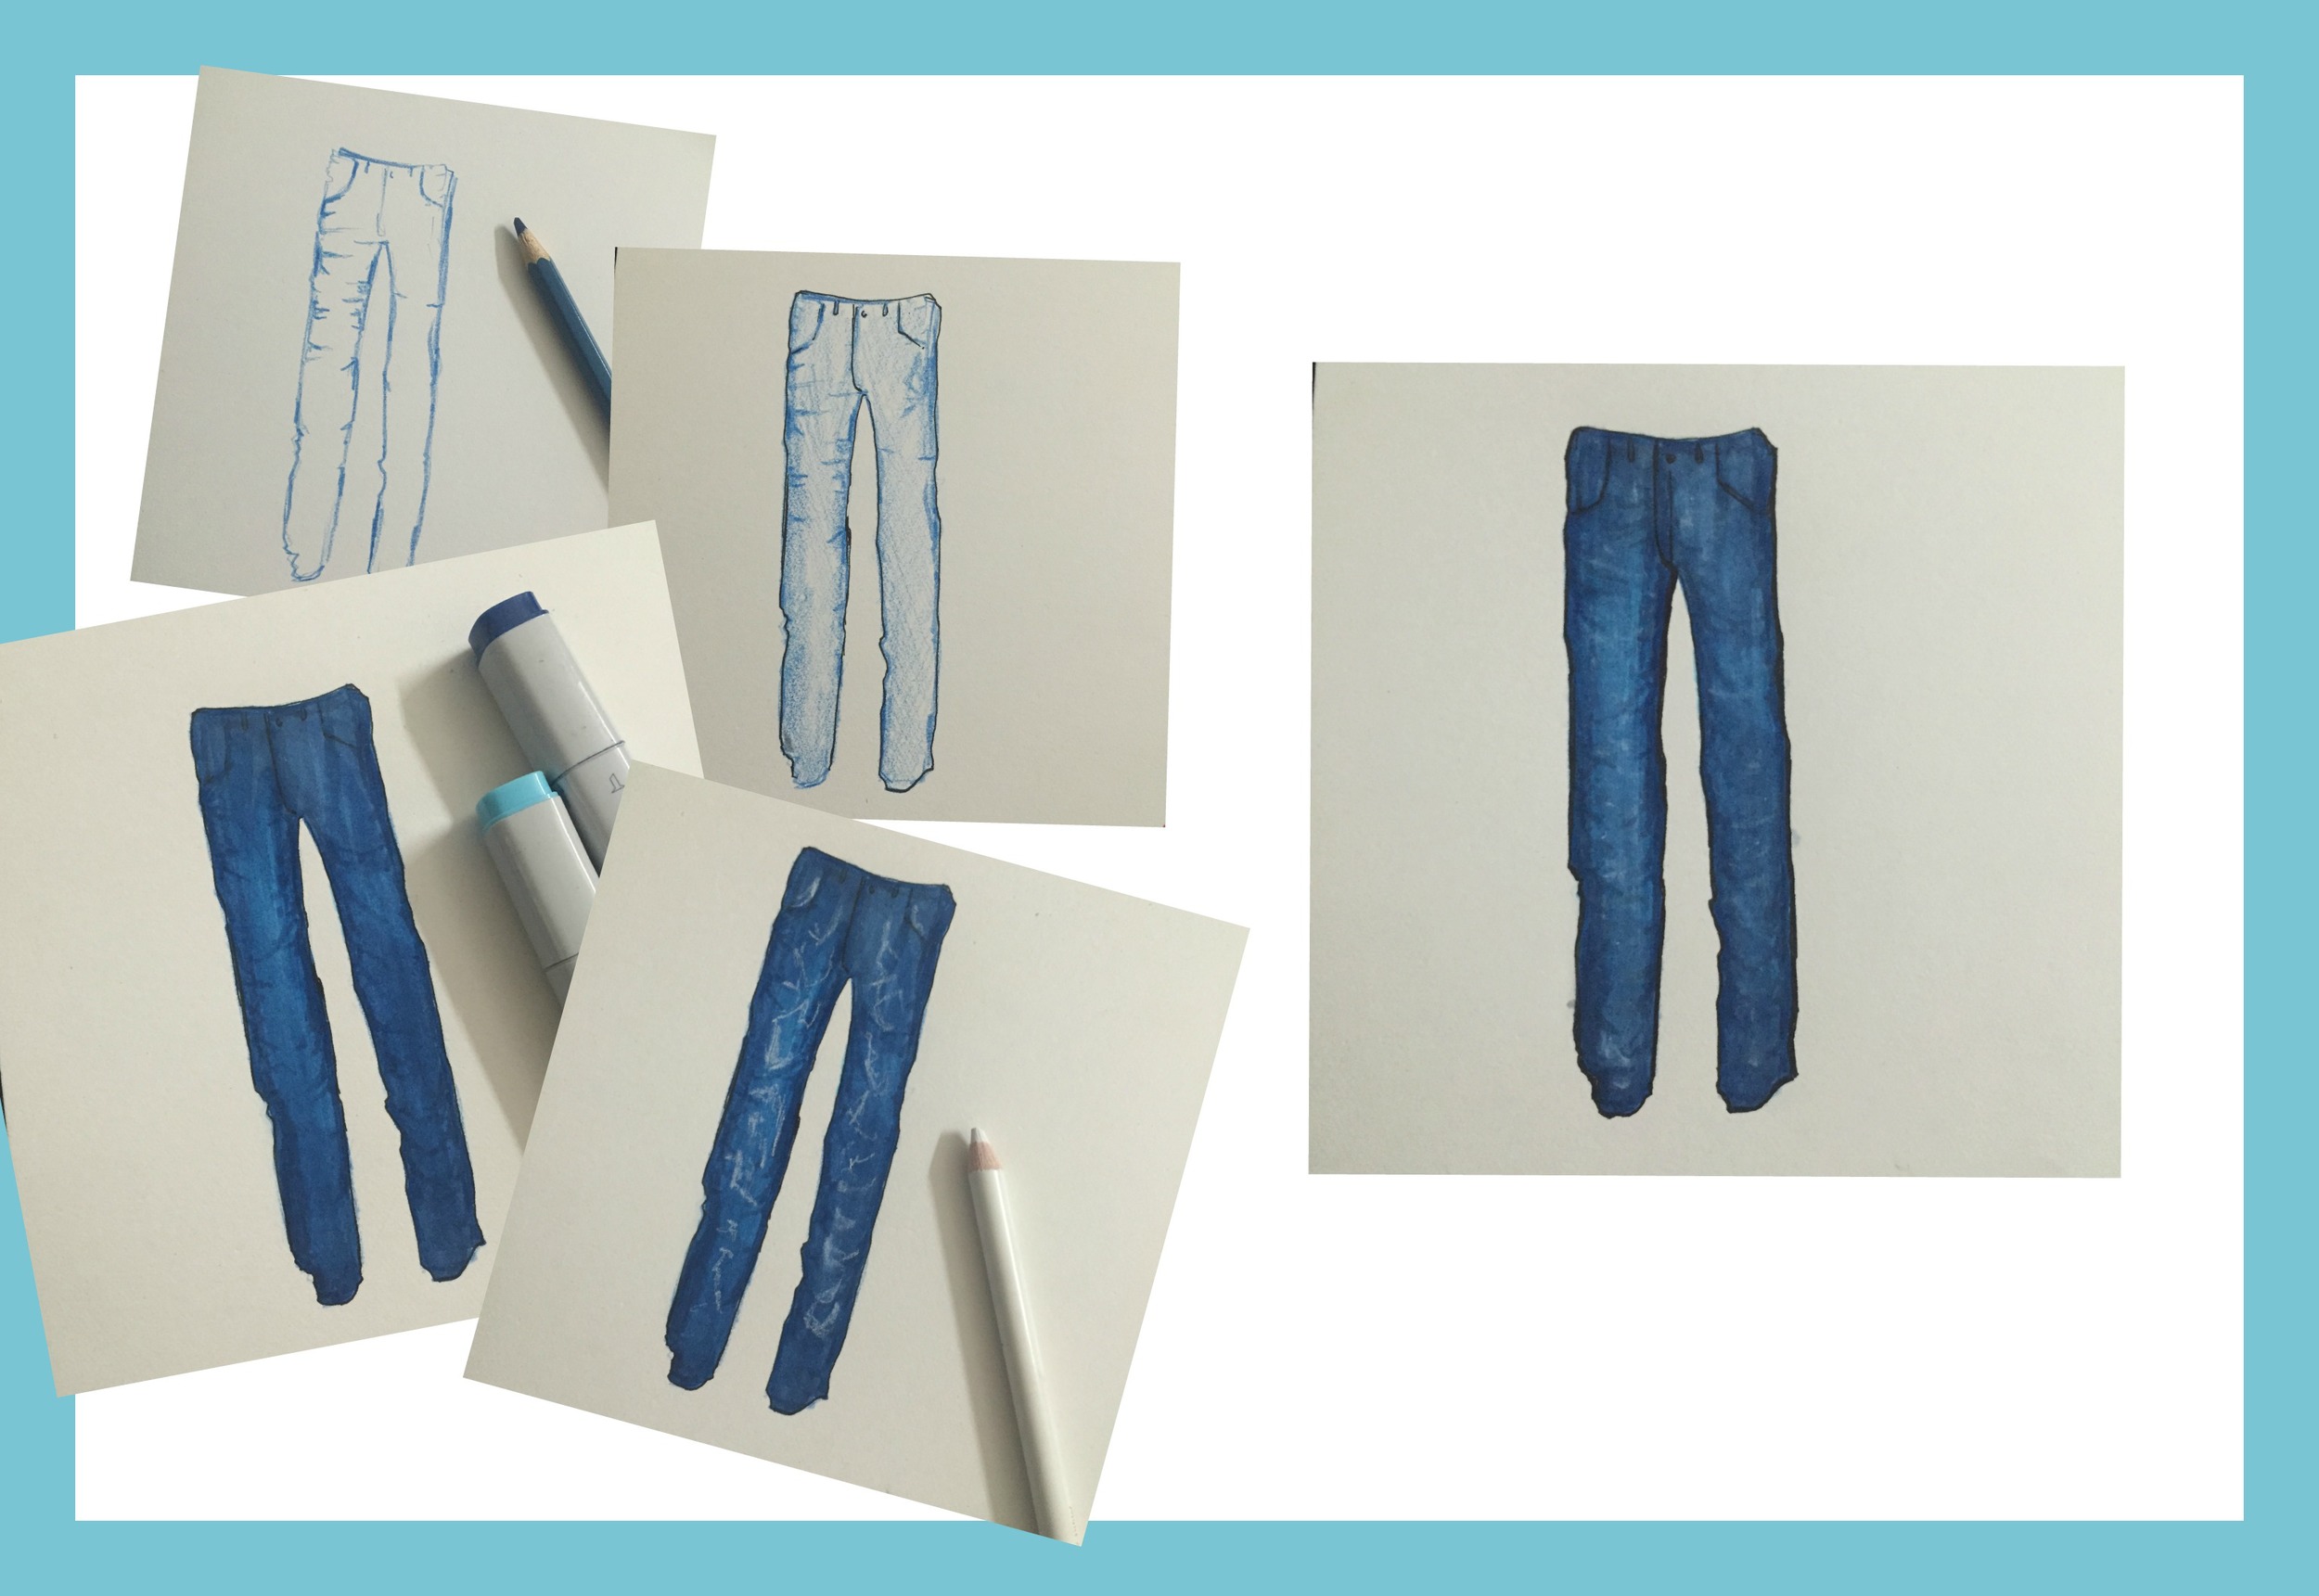
Rendering : Basic Denim
1) Draw the pair of Jeans with a colorpencil
2) Crosshatch and shade the pair with the same color pencil.
3) Run two shades of blue onto the shaded area
4) Apply less pressure on the centres
5) Use the darker blue marker to add shade.
6) Use a white charcoal pencil to add highlights
7) Use a blending pen to blend the white to the blue.
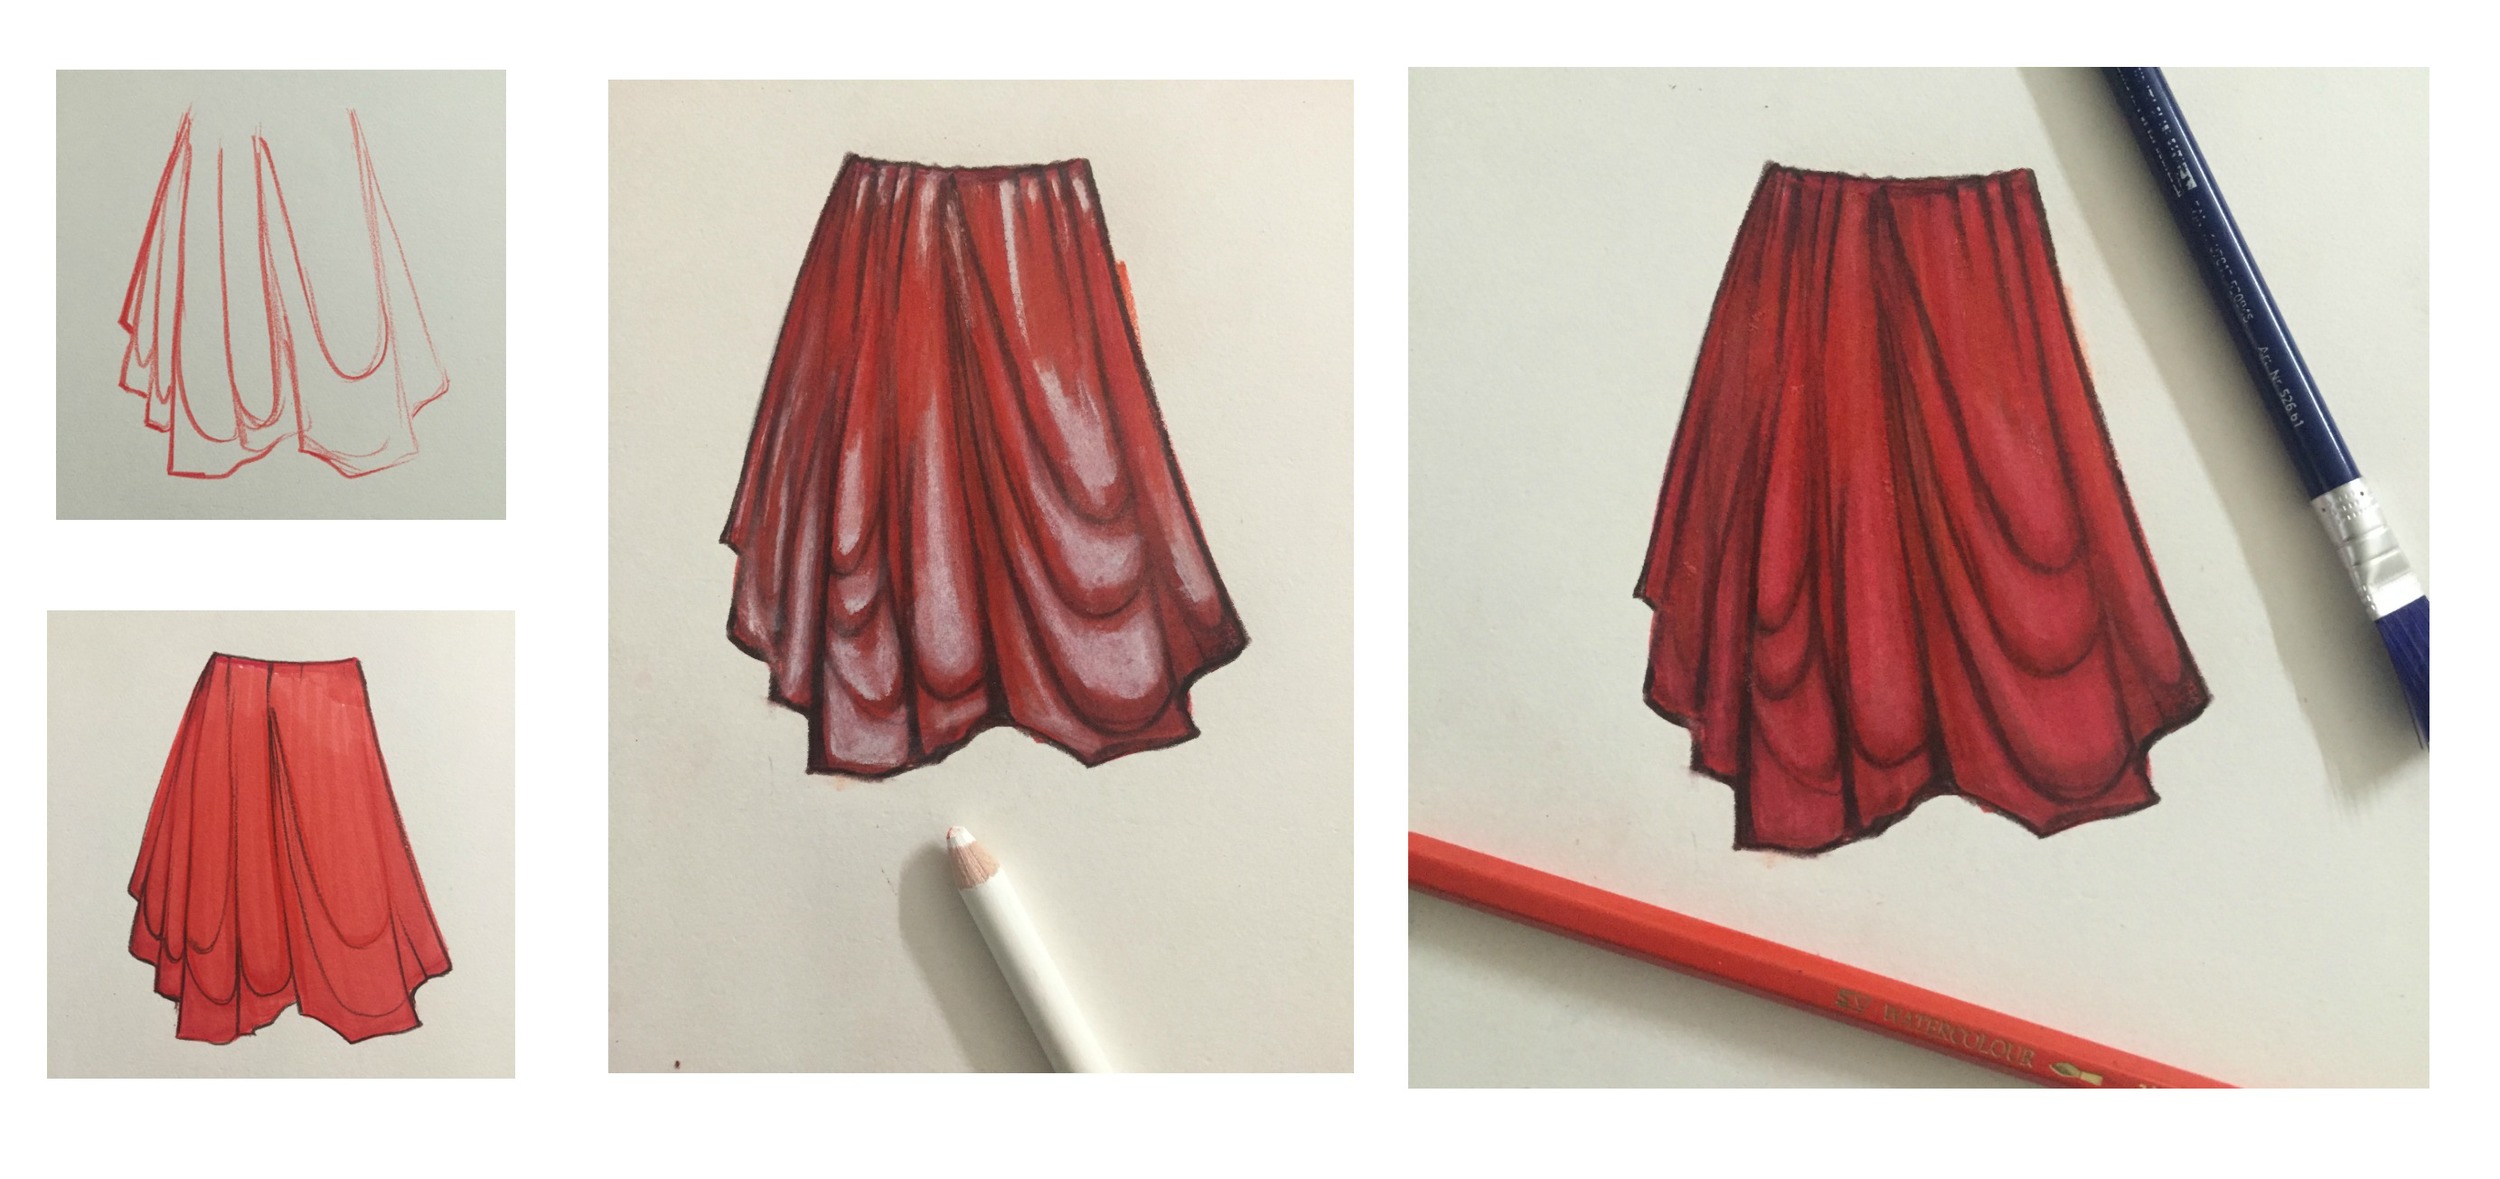
Rendering : Basic Drape
1) Draw the required Garment
2) Outline with dark brown color pencil, and color Red with Marker/Pencil
3) Shade with white charcoal pencil on areas of light.
4) Run Red marker or pencil and outline to complete the look.
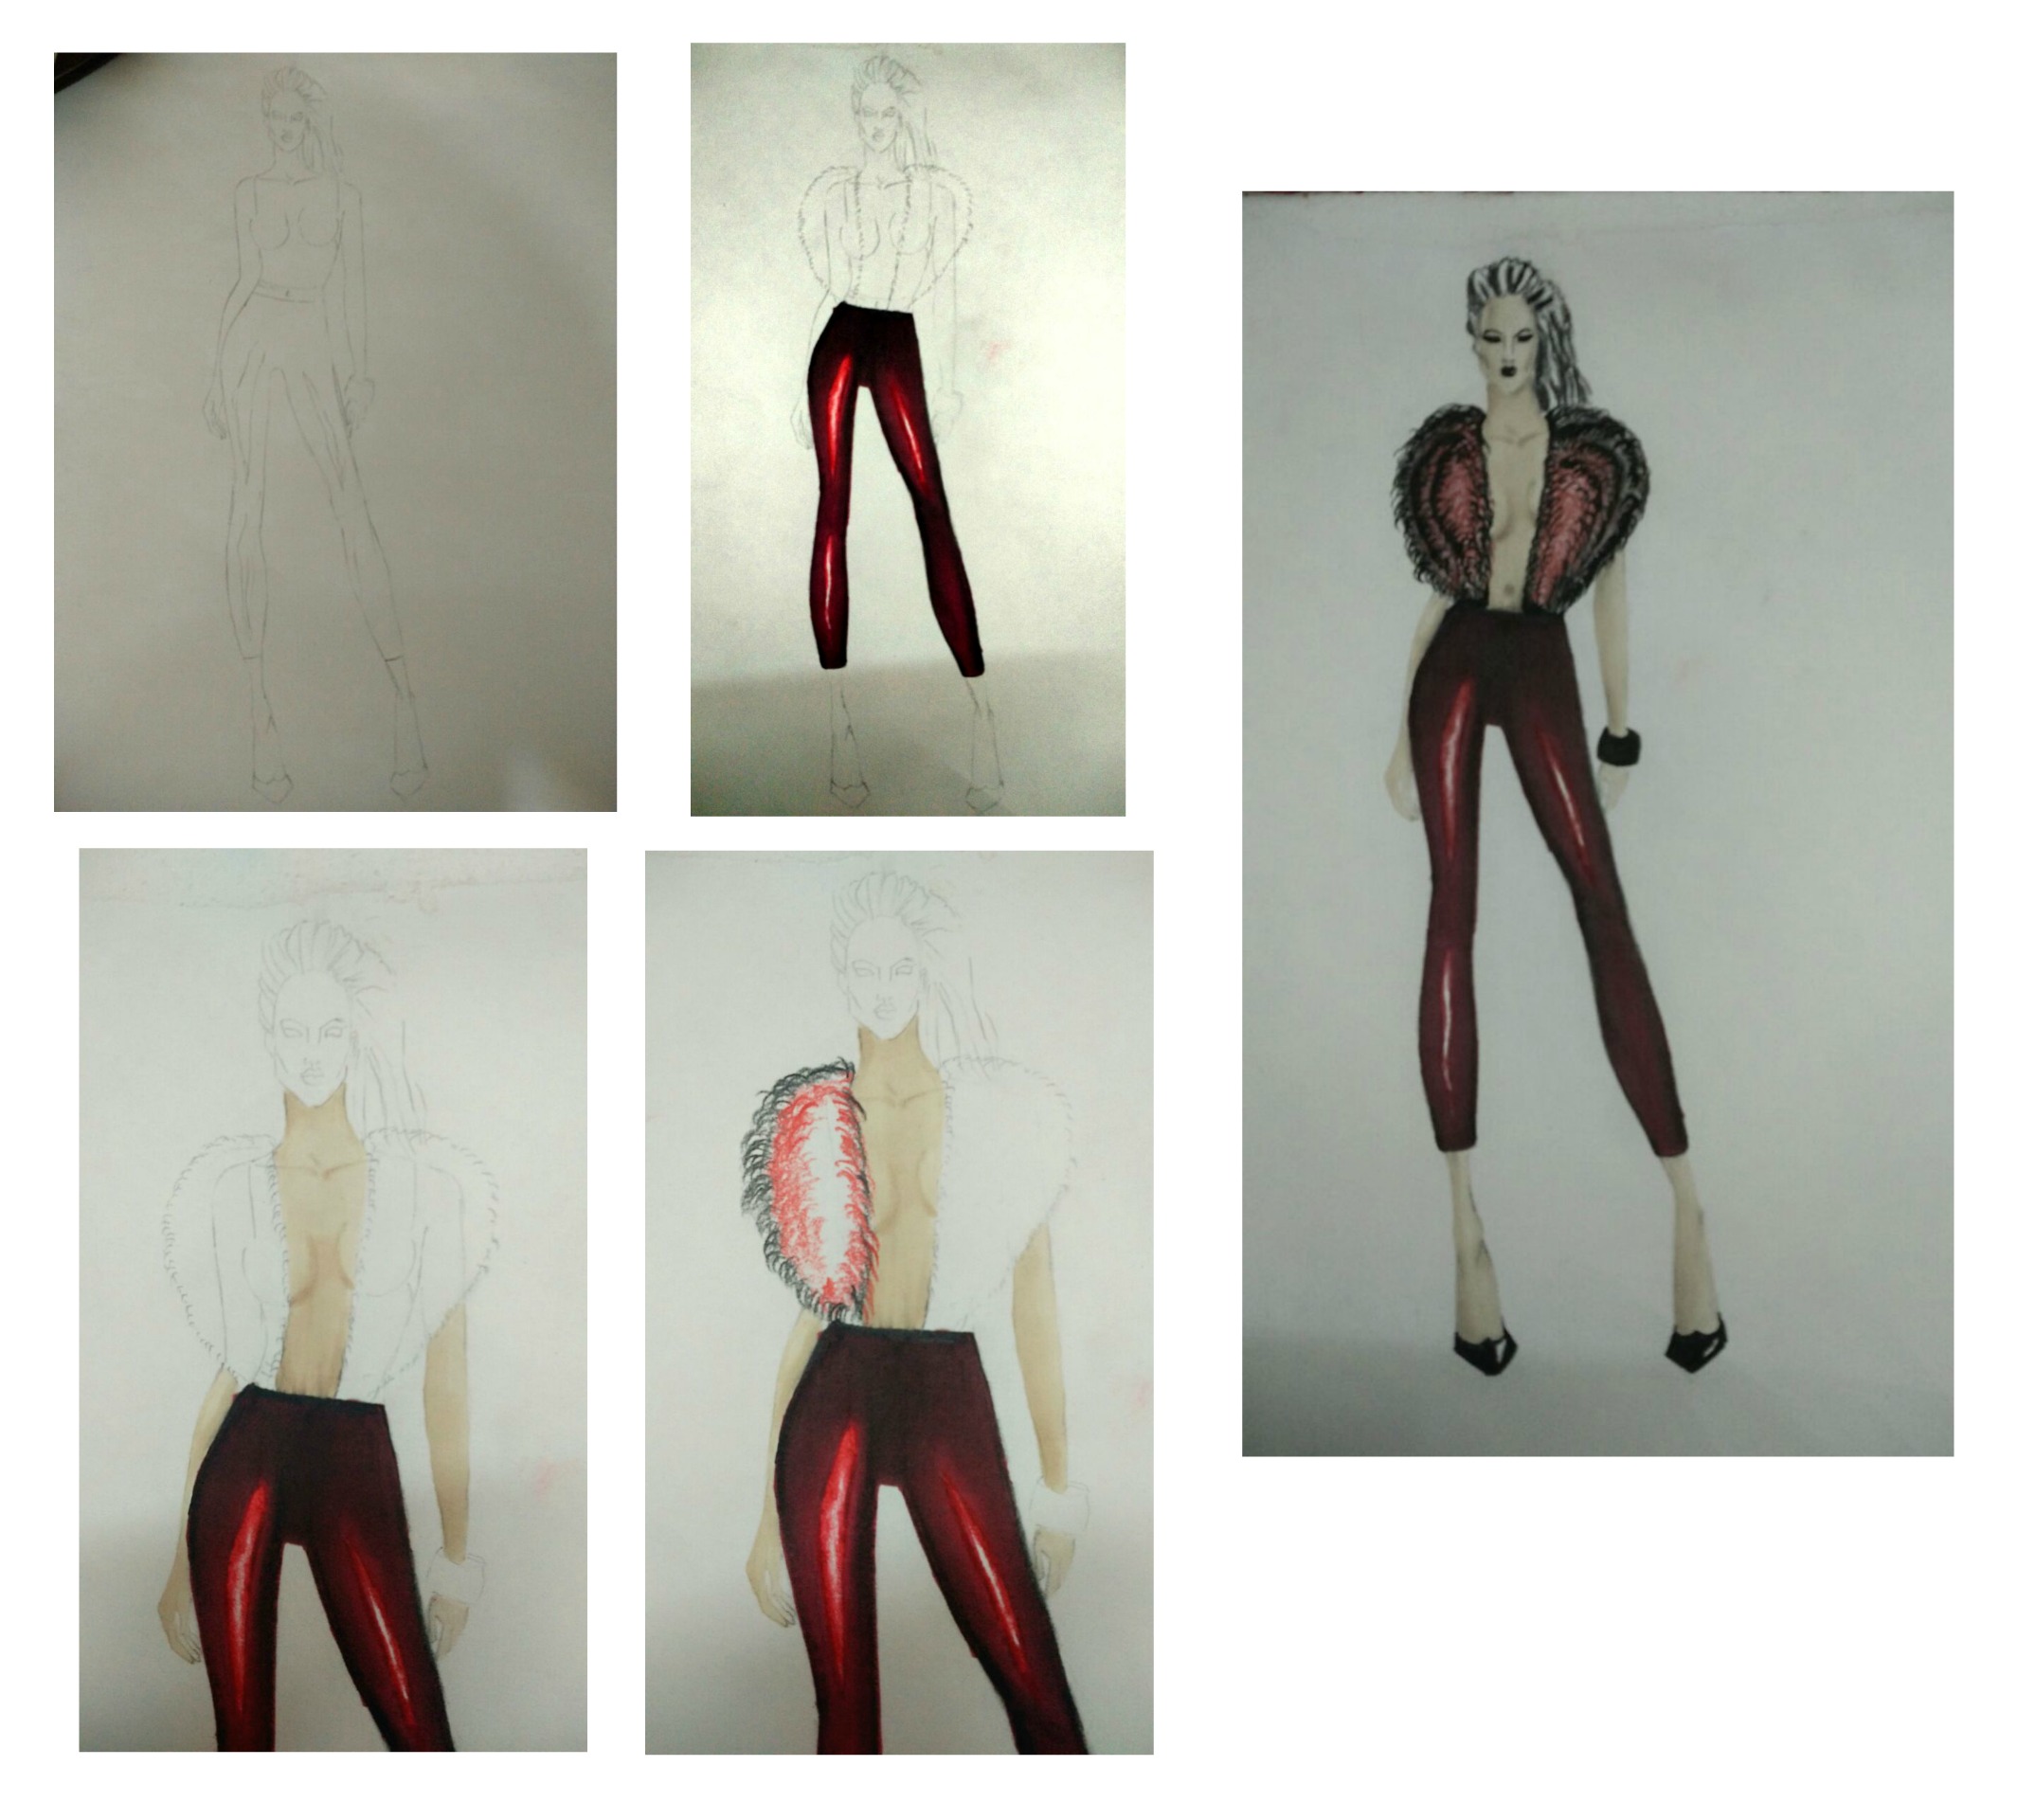
Rendering : Fur
1) Draw the required Garment
2) Make the pattern of the Fur Jacket
3) Outline with color pencil
4) Using blender and black fine tip pen, add details.
Tip : Painting Fur
“Try using a little paint with a brush and no water. Test it out on a scrap piece of paper, lose the excess paint, you should be left with feather-y brushstrokes.”
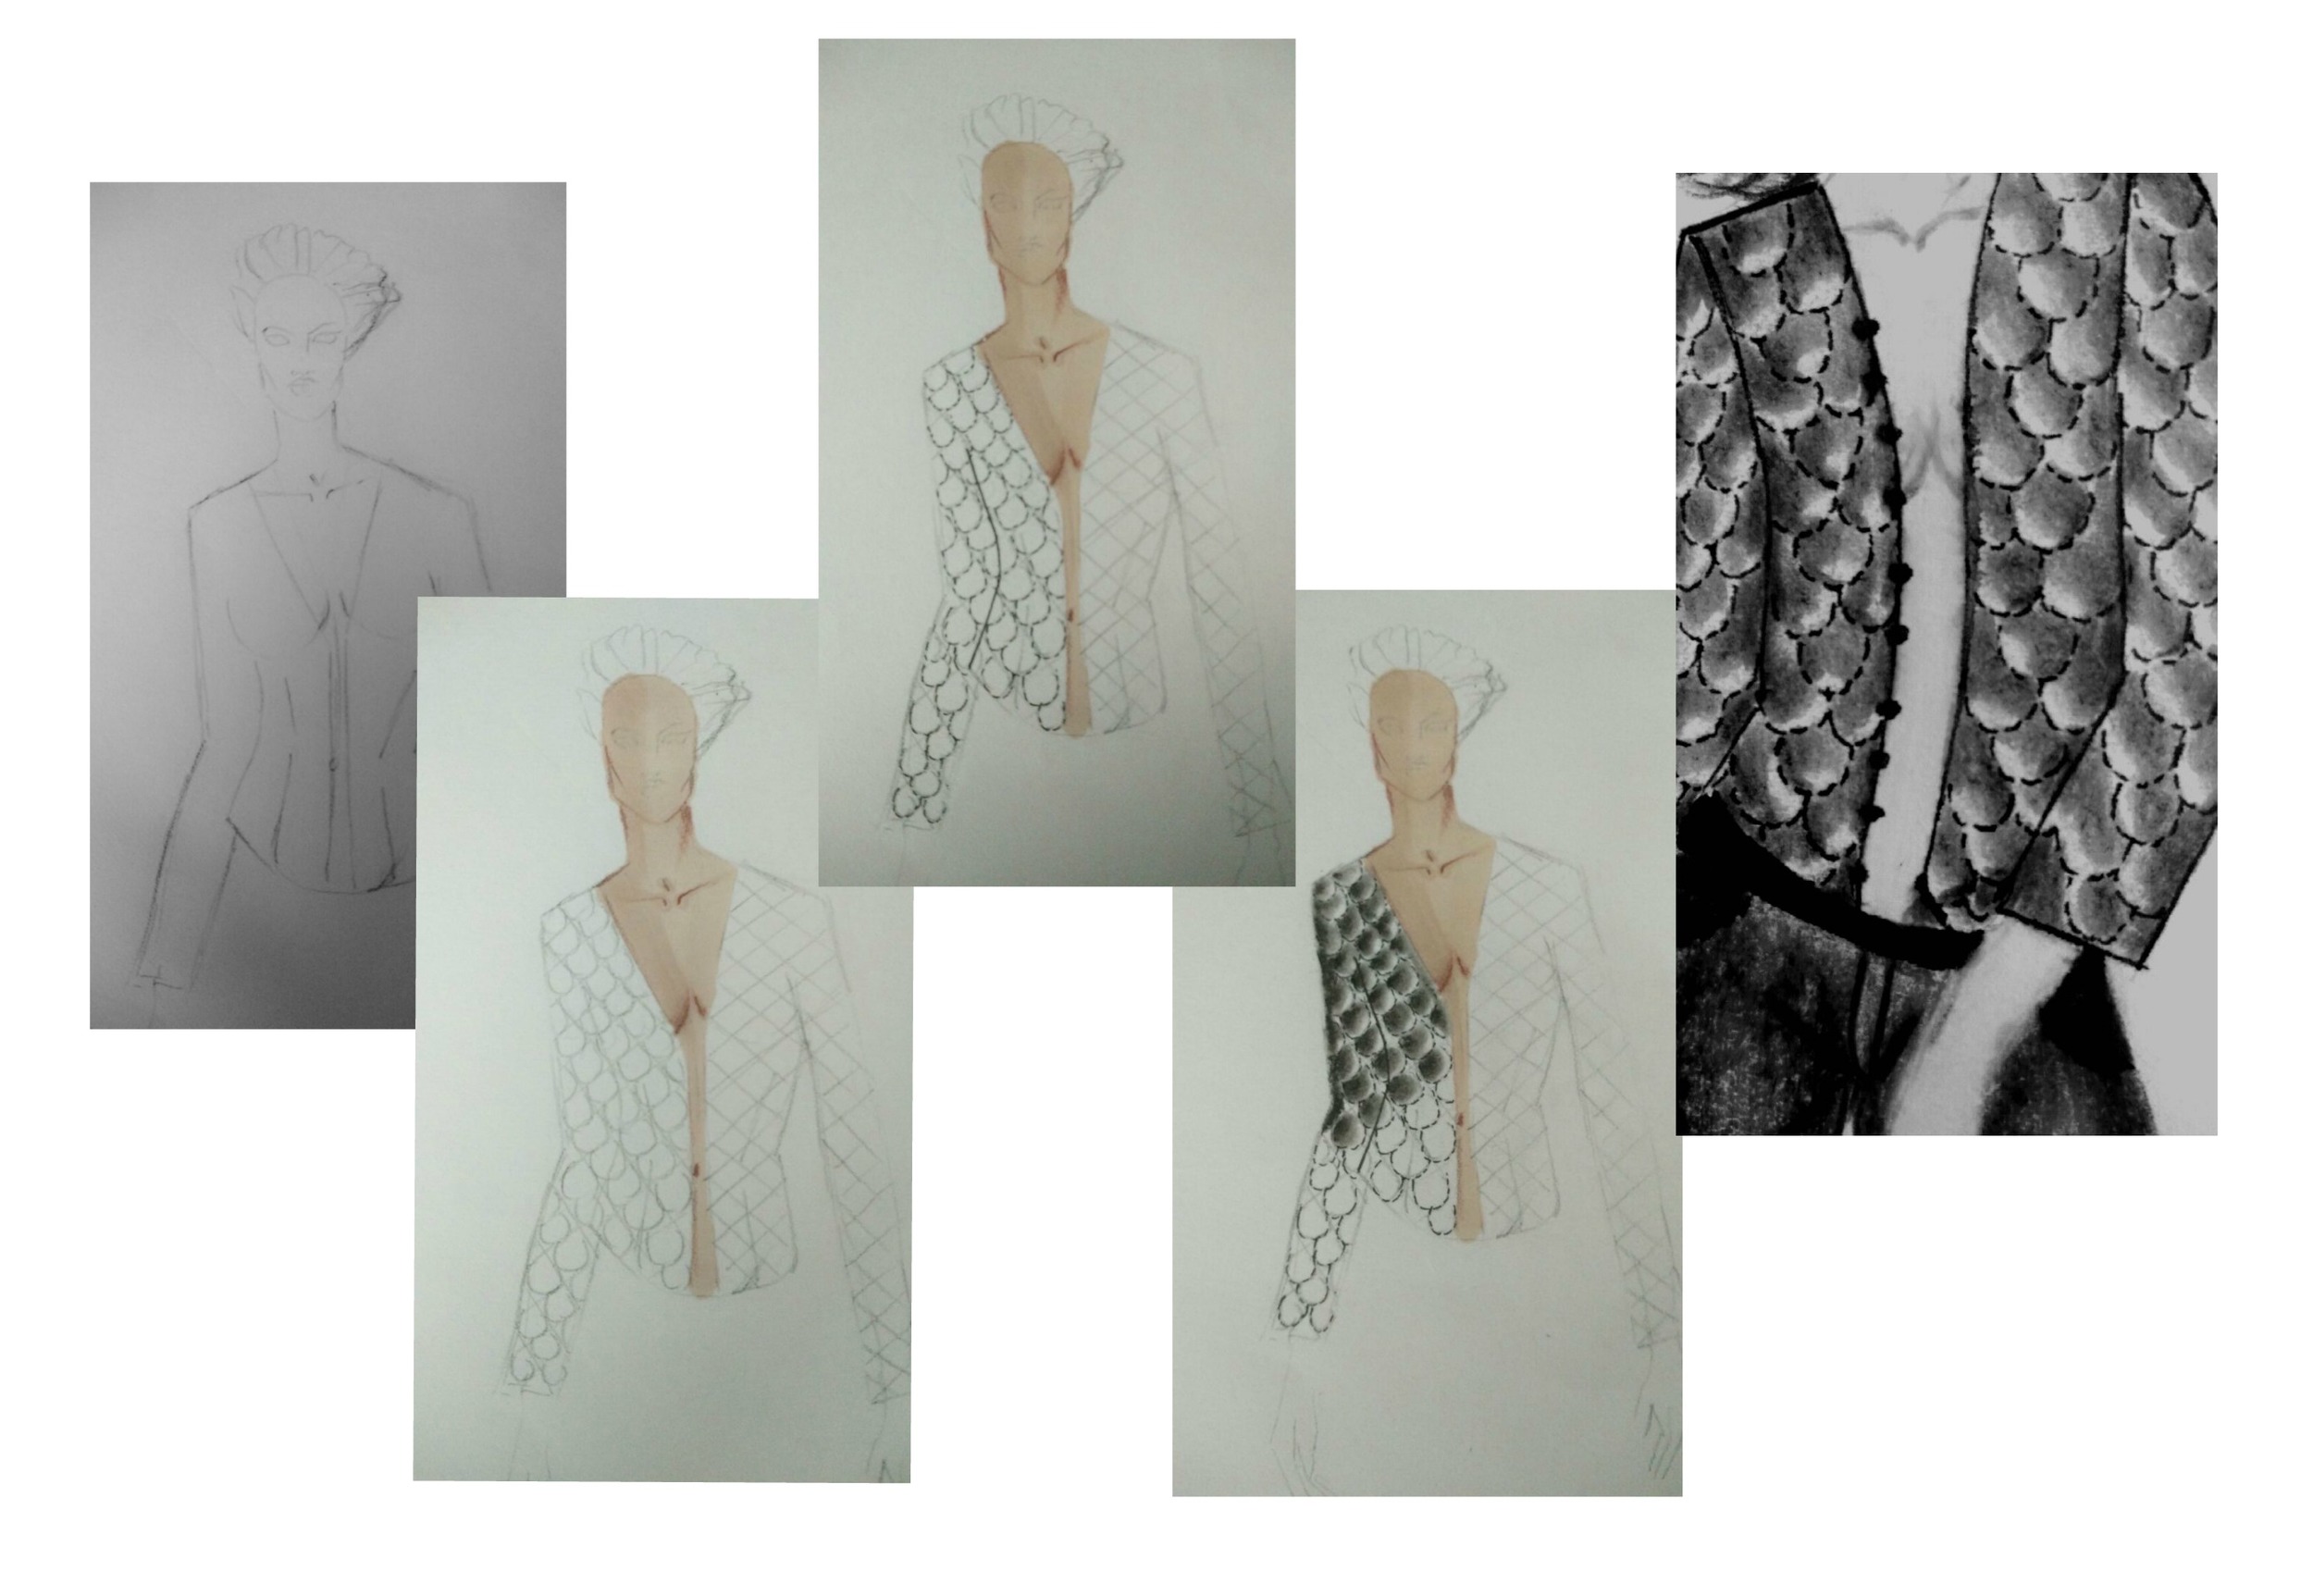
Rendering : Quilting
1) Draw the required Garment
2) Make the pattern of the quilting onto the jacket
3) Outline pattern with black fine liner
4) Using black pencil, color 3/4th of the area and smudge.
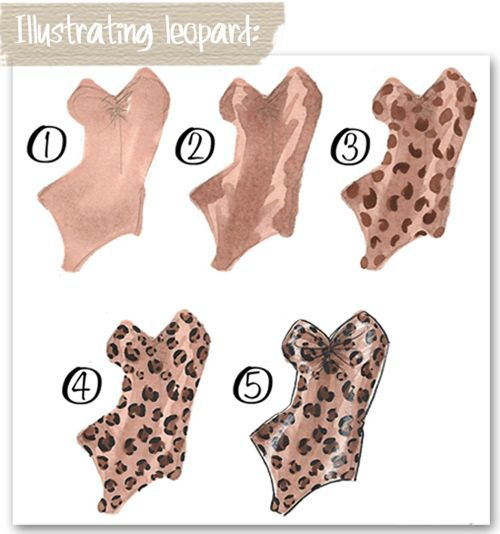
The Leopard Print, Simplified.
Tip : Using Markers and Watercolors here is a good bet.
Five questions to pefect your poses
1. What’s the most important feature?
Which feature of your drawing needs to stand out the most? Is it the dress/bag/jacket? If you’re working for a client often this will be something that is defined by their brief. If you know which feature you really want to draw attention to then you’ll need to choose a pose that emphasizes this. It might help to look through some magazines and see if you can identify which feature is being emphasized in each image. This will help you to work out which poses will help draw attention to different features.
2. Is the pose elegant?
When creating fashion illustrations it is important to consider the elegance of the pose. You want the figure to look elegant, comfortable and natural and not awkward (unless of course awkwardness becomes a part of your style). Look out for arms bent at strange angles or bodies twisted in odd ways.
3. Do you have to work to a layout?
If you’re working to a brief it is likely that you will be given a particular shape to work to – whether it’s a magazine page or a website header. You will need to make sure you chose a pose that will fit well into this shape. Alternatively, if you’re working for your own piece think about where it will end up – if it’s on your blog, does portrait or landscape work best, if it’s for Instagram, does it fit in a square?
4. Is the figure alone?
It’s important that your figure is a nice, pleasing shape on the page, wherever it is placed. If drawing more that one figure you’ll need to think about how they work together as shapes. Be careful not to stick elbows into each other and vary the poses in a line up. Work on each figure separately and then lay them out to see how they interact.
5. Where is your figure?
While it is important not to be scared of white space, sometimes you may want to add a background or some context to your illustration. Again, if you’re working with a client this is likely to be something that they define.
When adding backgrounds or additional elements they should connect with the figure and make sense spatially. Simply adding a shadow is another way of helping stand your figure on the page.
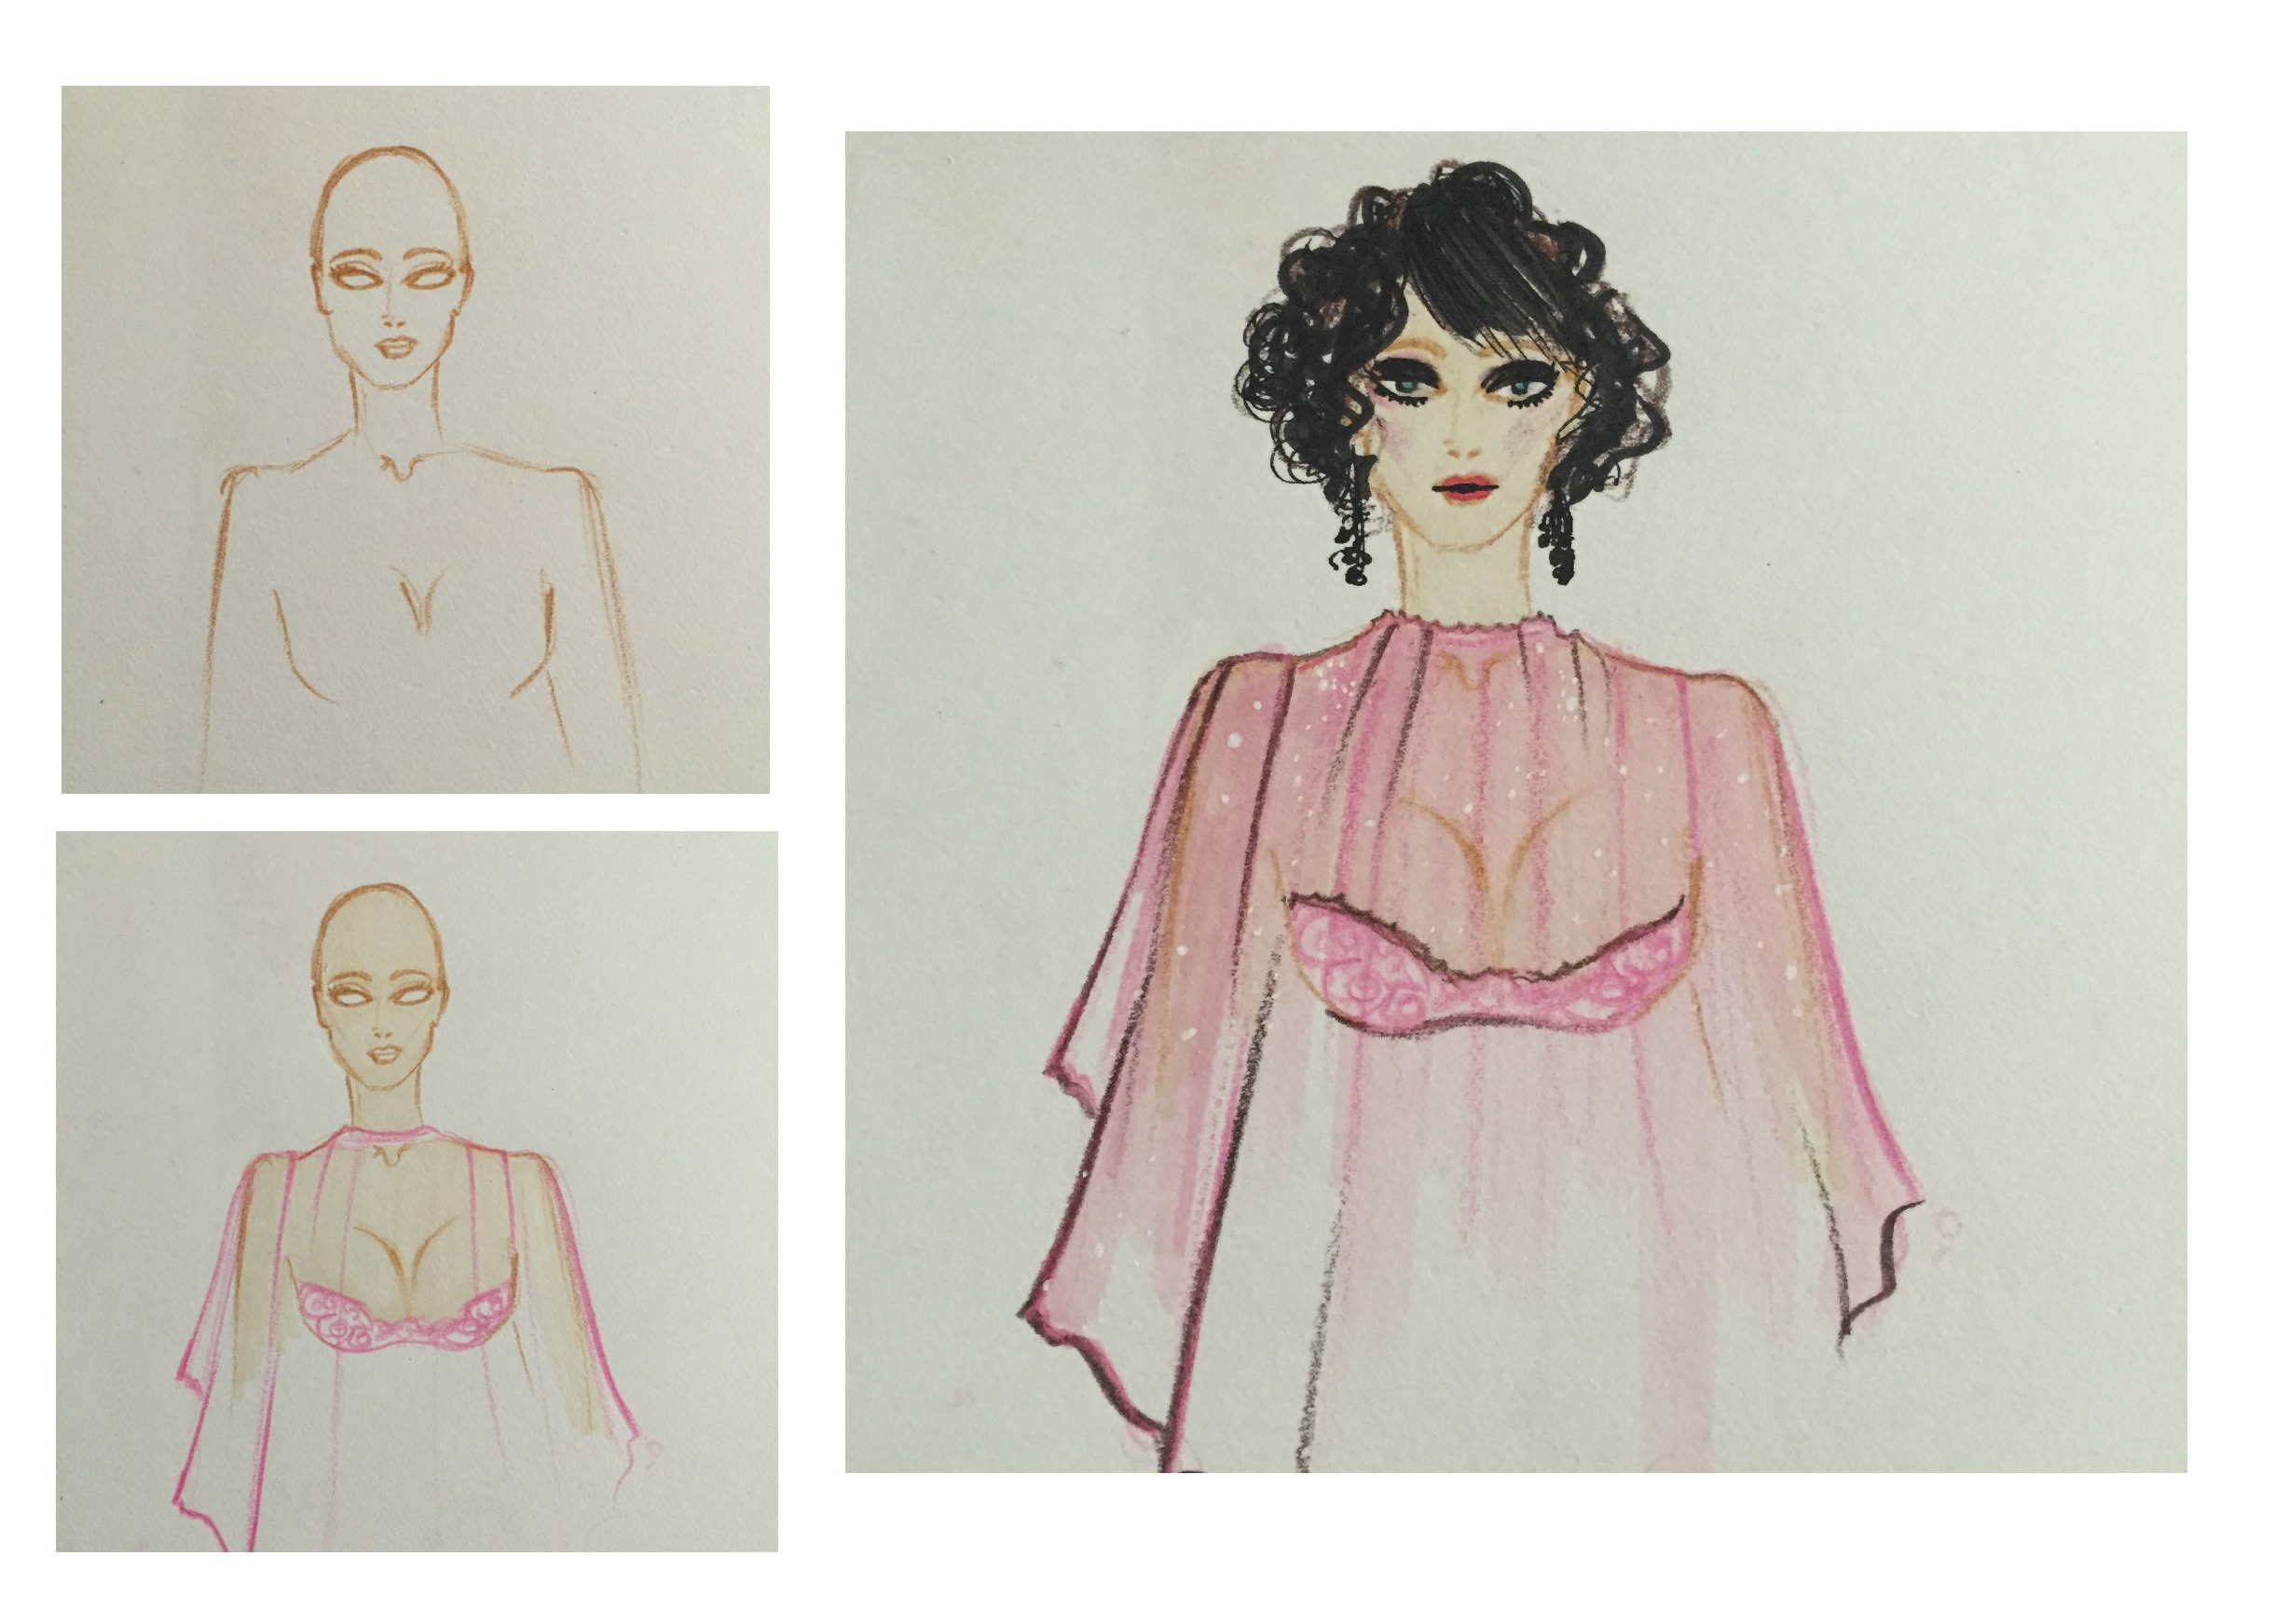
Rendering : Skin + Sheer
1) For Skin always outline with a brown marker
2) Using the Sating coloured marker, fill in color
3) Draw sheer style
4) Shade with pink marker and add details.